In recent issues we’ve had a look at a few aspects of tyre repair. We’ve stepped through plugging a tubeless tyre and we’ve laid out the process of repairing a tubed tyre. Last issue we looked at bead breakers. Now here’s a quick look at a very serious and challenging part of the procedure for adventure riders – getting the tyre back on.

A mid all the drama facing a rider doing a tyre repair, getting the tyre back in place isn’t usually considered a big deal. But now rear wheels and tyres need to cope with in excess of 100 horsepower on rough terrain and tyres and wheels are being constructed so the two stick together like politicians with dual citizenship. Wheels are designed so they grip tyres hard, and with big bikes running at over 180kg, the tyres themselves are seriously tough and comparatively inflexible.
But flats are still happening, so we need to be equipped to deal with them.
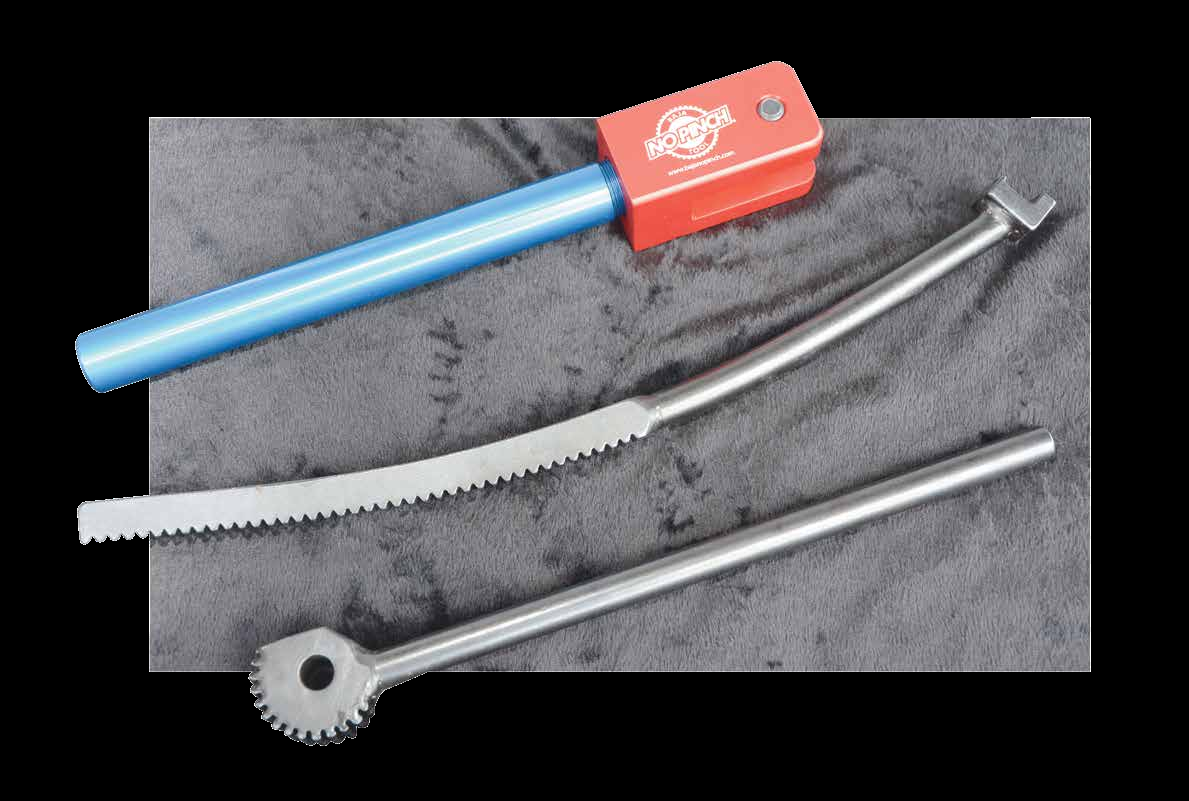 The Baja No Pinch. A tube goes through the hub in place of the axle and a toothed, curved, metal bar with a clawed foot pushes the bead over the rim.
Tough ask
In issue #26 we had a look at bead breakers. On trail and enduro bikes breaking the bead is a simple matter of planting a booted foot on the tyre wall and squishing down on it. On a big adventure bike – and even on the not-so-big adventure bikes – it takes a lot more force and even a bit of cunning.
Getting that tyre back on the rim, and getting that bead to set, is a challenge every bit as tough, and every bit as important. The editor rates himself as handy with tyre levers, but a recent tyre change on his KLR had him looking for solutions. It wasn’t the KLR rim that was the problem.
It was the tyre. A new Mitas ME09 Dakar was so tough even a well-equipped work-shop with a tyre-changing machine had trouble.
So here’s a few basics to keep in mind and a couple of bits and pieces of hard-ware we put to the test.
 Getting a tyre back on can be challenging for adventure riders.
Baja No Pinch
New tyres tend to be a whole lot tougher to deal with than tyres with a bit of wear on them, especially if an old tyre’s warm from being ridden. We’d seen plenty of overseas ads and Youtube videos showing the Baja No Pinch, and according to all of them it made the job so easy people were doing tyres just for fun. So we ordered one. We had to buy it from the US, and it cost around $175 real Aussie dollars.
Then, because the chosen test wheels had 17mm axles, we had to stump up another $50 for an adaptor because the supplied shaft is 20mm. So it’s not a cheap option.
 We bought the Motion Pro Bead Buddy 2, but we weren’t impressed with it.
The tool is a kind of a ratcheting-lever deal. A tube goes through the hub in place of the axle and a toothed, curved, metal bar with a clawed foot pushes the bead over the rim. The idea is to lube the bead of tyre, slip it on the rim as far as it will go, then insert the Baja No Pinch and use the mechanical advantage of the lever on the toothed bar to push the bead of the tyre over the wheel.
We gave it a try.
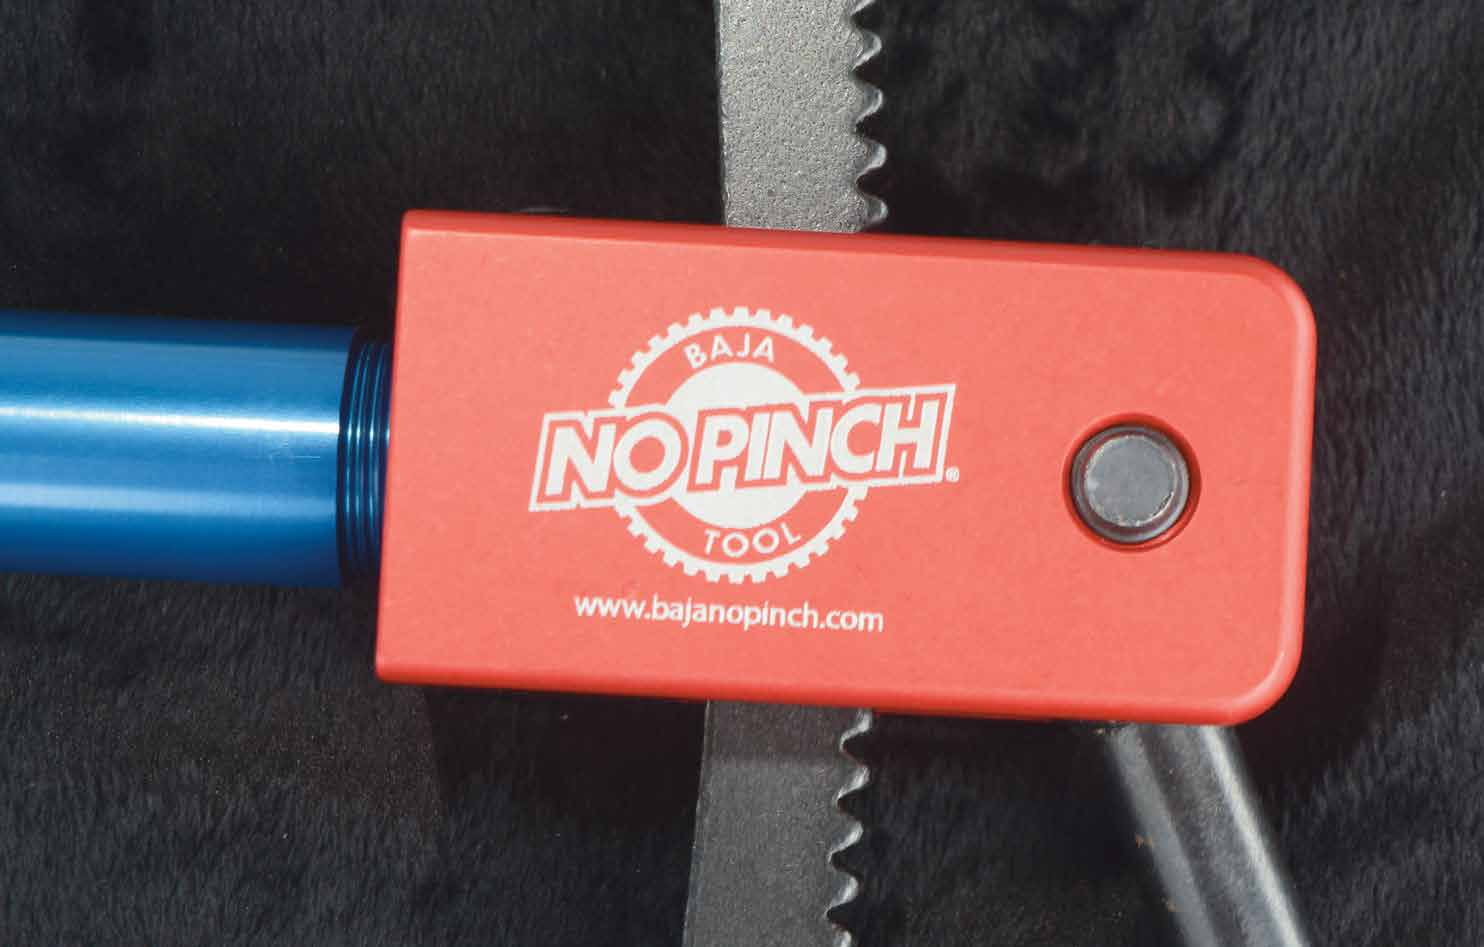 The Baja No Pinch. We had to buy it and an axle adapter from the US, and it ended up costing about AUD$225.
Slip up
We acknowledge this wasn’t a scientific or carefully controlled event. This is just the way it happened for us.
We started with a Honda wheel and a Mitas ME09. The tyre had had some wear, so it wasn’t at its most difficult, but it was still a challenge to fit with just levers.
The Baja No Pinch slid it’s shaft into the warm, lubricated hole in the hub like… well…we can’t actually think of anything that works like that to compare it to.
Anyway, with the Baja No Pinch in place we set the foot or claw of the lever on the exposed bead of the tyre and pulled the lever back 180 degrees. The tyre bead slid over the rim with practically no effort all!
As we moved further around, taking small bites, the process required more effort, but when that final couple of centimetres of tyre flubbed over the rim and into place, we hadn’t even started sweating. We’d forgotten to put air in the tube but it hadn’t pinched or anything.
We were amazed.
It wasn’t all heel-clickers and nac-nacs, though.
We had remembered to lube the bee-jezzus out of the tyre bead, and the Baja No Pinch claw slipped off quite a few times. That became a little annoying.
Then, when the tyre began to protest, the claw on the tool roughed up the tyre bead a little.
At the end of it all, we’re going to chuck the Baja No Pinch into the bike tool kit and carry it. We don’t feel it’s a 100-per-cent, guaranteed certainty for getting a tough tyre on, but we feel it’s a good-enough piece of kit to justify its place on board when we ride.
We’re tough judges, so that says a lot for the Baja No Pinch.
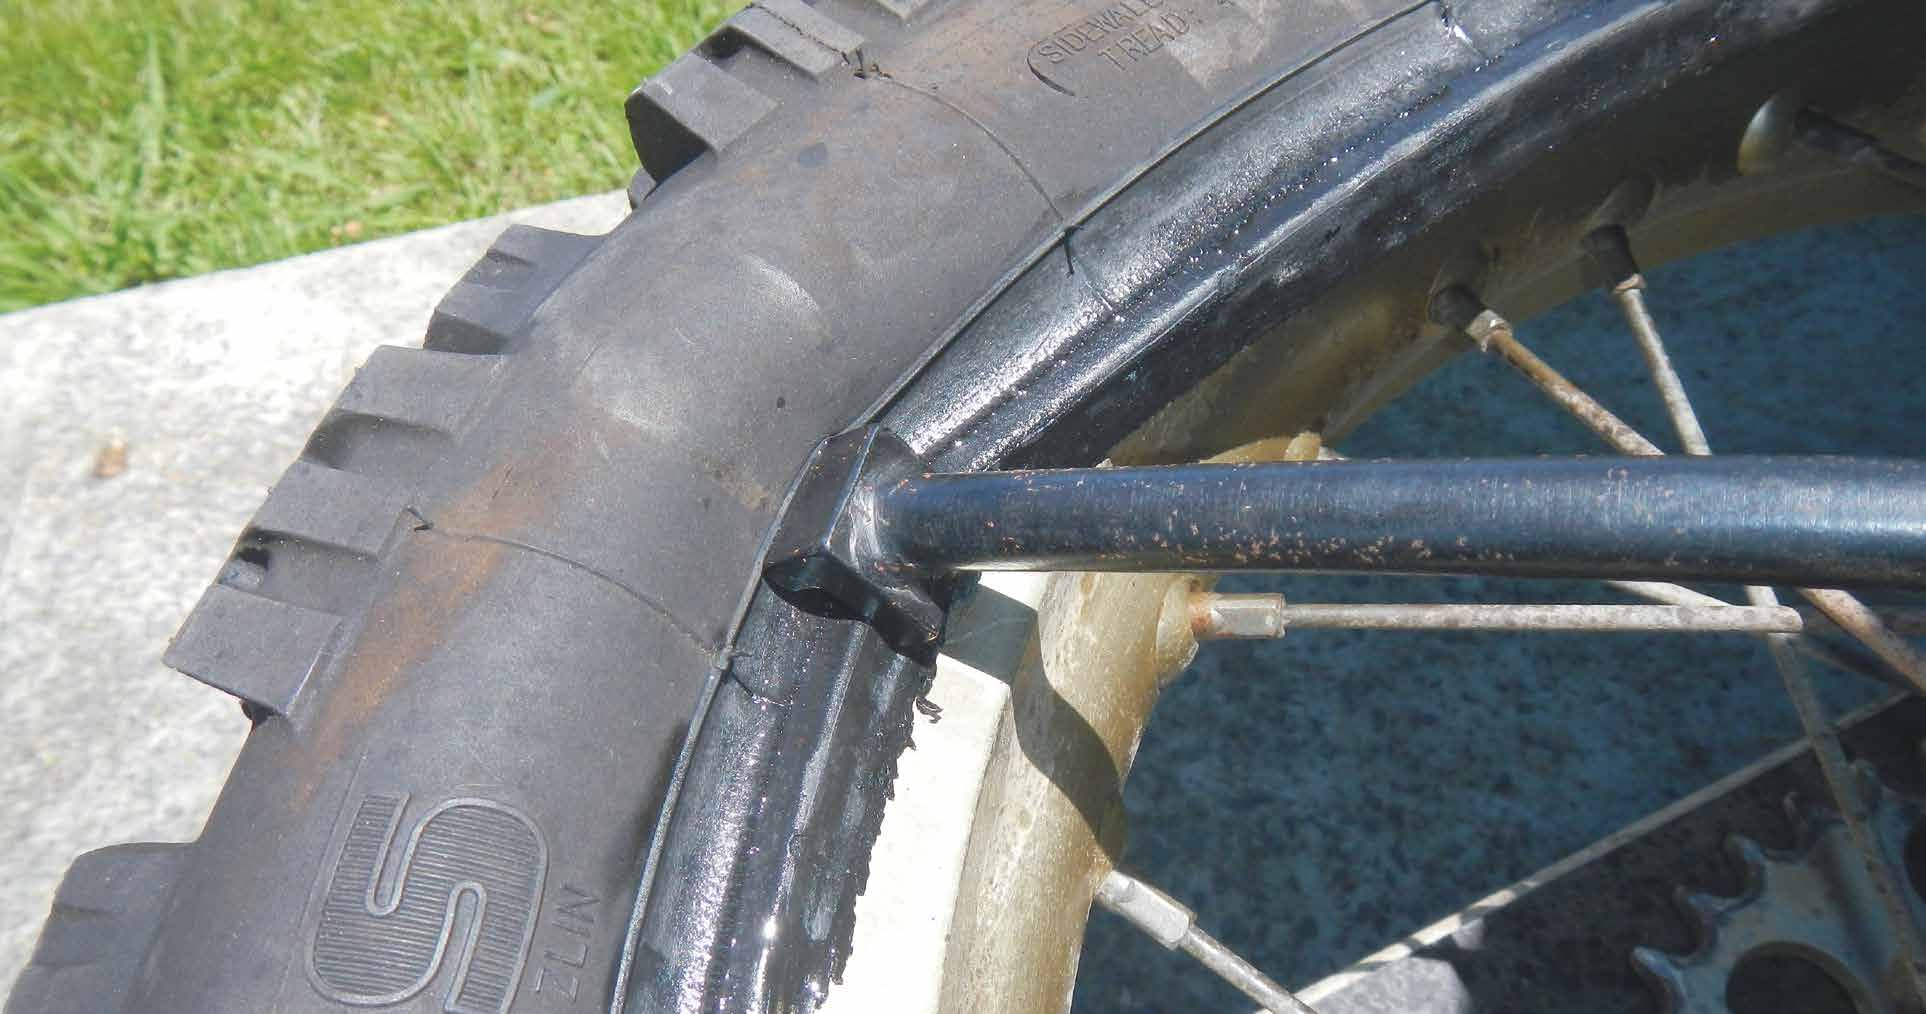
 The Baja No Pinch claw slipped off a few times because of the lube on the bead. It also started to chomp little pieces of rubber from the bead when the going got tough. It did the job, though.
Next
We’ve always managed to get the tyres over the rims with just tyre levers and a boot or sometimes a soft-faced mallet – even the really tough ones – but it’s becoming a struggle and we’re starting to see a bit of damage.
Rims are getting badly knocked about and pinching tubes is becoming way too common. We’re going to have to start carrying equipment to make sure we can get the job done.
A few of tips to remember:
• Lube the bead generously. A mild solution of dishwashing liquid and water, WD40, specialist lube like BeadGoop, soft soap…there are lots of possibilities, but you can take it from us, without lube, getting a tough tyre on and the bead to set will be nearly impossible. Just as an aside, we know of one seasoned pro who recommends petrol on a seriously tough bead. We’ve never tried it, but we saw him do it with our own eyes on a tyre we couldn’t get to set, and it worked like a charm
• Tiny bites. When moving the tyre levers around and easing the bead over the rim, the smaller the bite of tyre, the less troublesome things will be

• Keep the rest of the tyre down in the well. This is vital on tough adventure tyres. On trail and enduro rims the tyre could be pushed down into the well with a knee while the levers were working the bead over the opposite side of rim. Adventure-bike rears will probably need tools. We bought the Motion Pro Bead Buddy 2 because we could get one at a local shop, but we weren’t impressed with it. Maybe our wheel was an odd one, but we couldn’t get the Bead Buddy 2 in place and locked on a spoke. It just wasn’t long enough. There’s other alternatives. Things like the No-Mar Extra Hand, vice grips, or, if necessary, a heavy-set mate wearing boots will usually do it, but not always. You may have to get inventive. No matter what you choose it means carrying extra equipment, but it’s better than being stuck with a tyre repair you can’t complete
• A warm tyre is much, much easier to handle than a cold tyre. If possible, leave the wheel or tyre in the sun for a while before doing the change, or if it’s a repair, do the repair as fast as you can after the tyre has cooled off enough for you touch without burning yourself.
While we’re there
Speaking of tough, inflexible tyres, another difficult part of the process is lifting the tyre wall to get the valve stem through the hole in the rim.

We got tired – tyred? – of scraping all the skin off our knuckles and bending our fingers back until they nearly snapped, so we bought a valve puller. It’s a short, strong cable with a thread that screws into the valve stem. The cable threads through the hole in the rim and attaches to the valve. Pulling on the cable then drags the valve stem into the tyre and out through the hole in the rim. Job done.
We need to do some practice with ours, but it definitely works. You can get them in lots of places, but we see Mal and Karen at Adventure Bike Australia have them for $20.
If the tyre’s a newie, you’ll be able to work from the opposite side to slip the valve stem in place because neither bead will be set. On a tyre already on a rim, you could break the bead on both sides to gain access to the valve hole in the rim and make it easy, but we have to say, “Oh, goodness me, no!” We wouldn’t break that second bead unless we absolutely had to.
Good luck with it.







Comments