
- It’s what we do – adventure motorbike riding tours magazine news events
- Dakar 2019: The Wish
- Yamaha Ténéré 700: First Aussie Ride!
- Under African Skies – australian adventure motorbike magazine
- Ducati Multistrada Enduro 1260
- Congregations (NSW and WA)
- Royal Enfield Himalayan – adventure motorbike magazine – australia
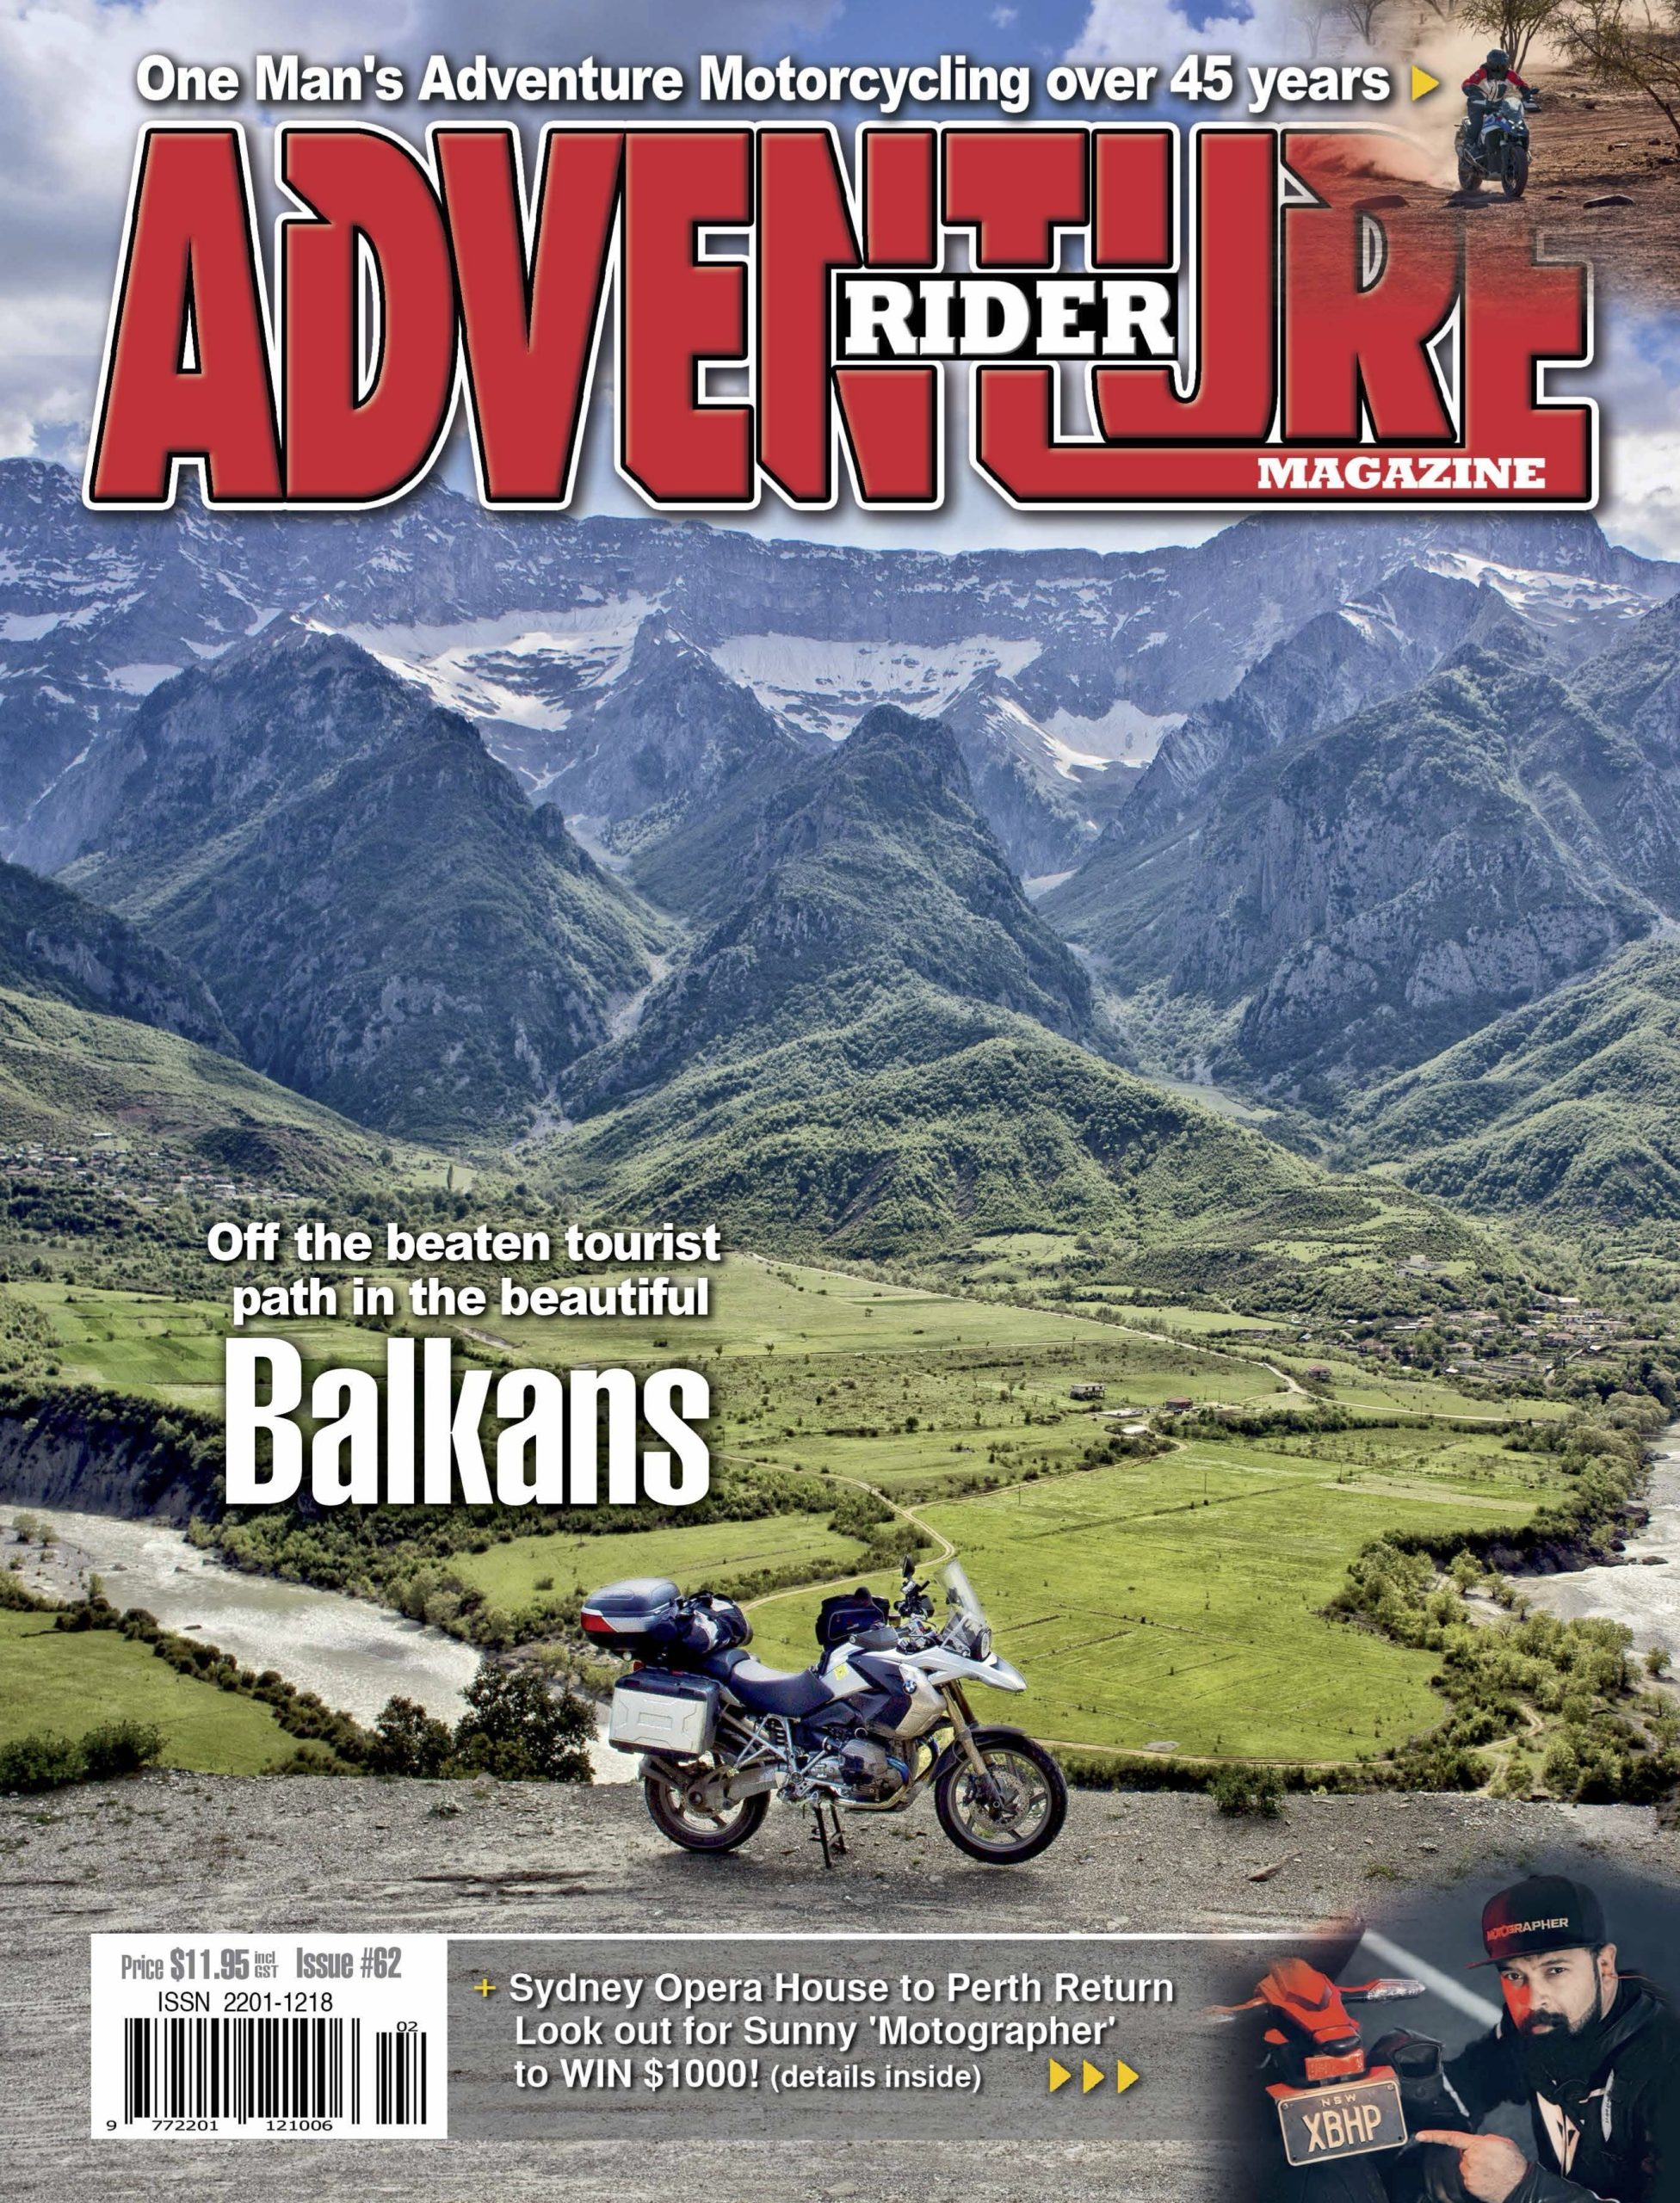
- Kimberley Dreaming
- Ural Adventure Ride = australian adventure motorbike magazine
- Bali Tour 2019 – Perth Adventure Riders
- Scott Britnell
- Window Shopping
- Fathers Day = australian adventure motorbike magazine
- Blue Banger Run = adventure motorbike riding
- KLRRR
- Best Job In The World
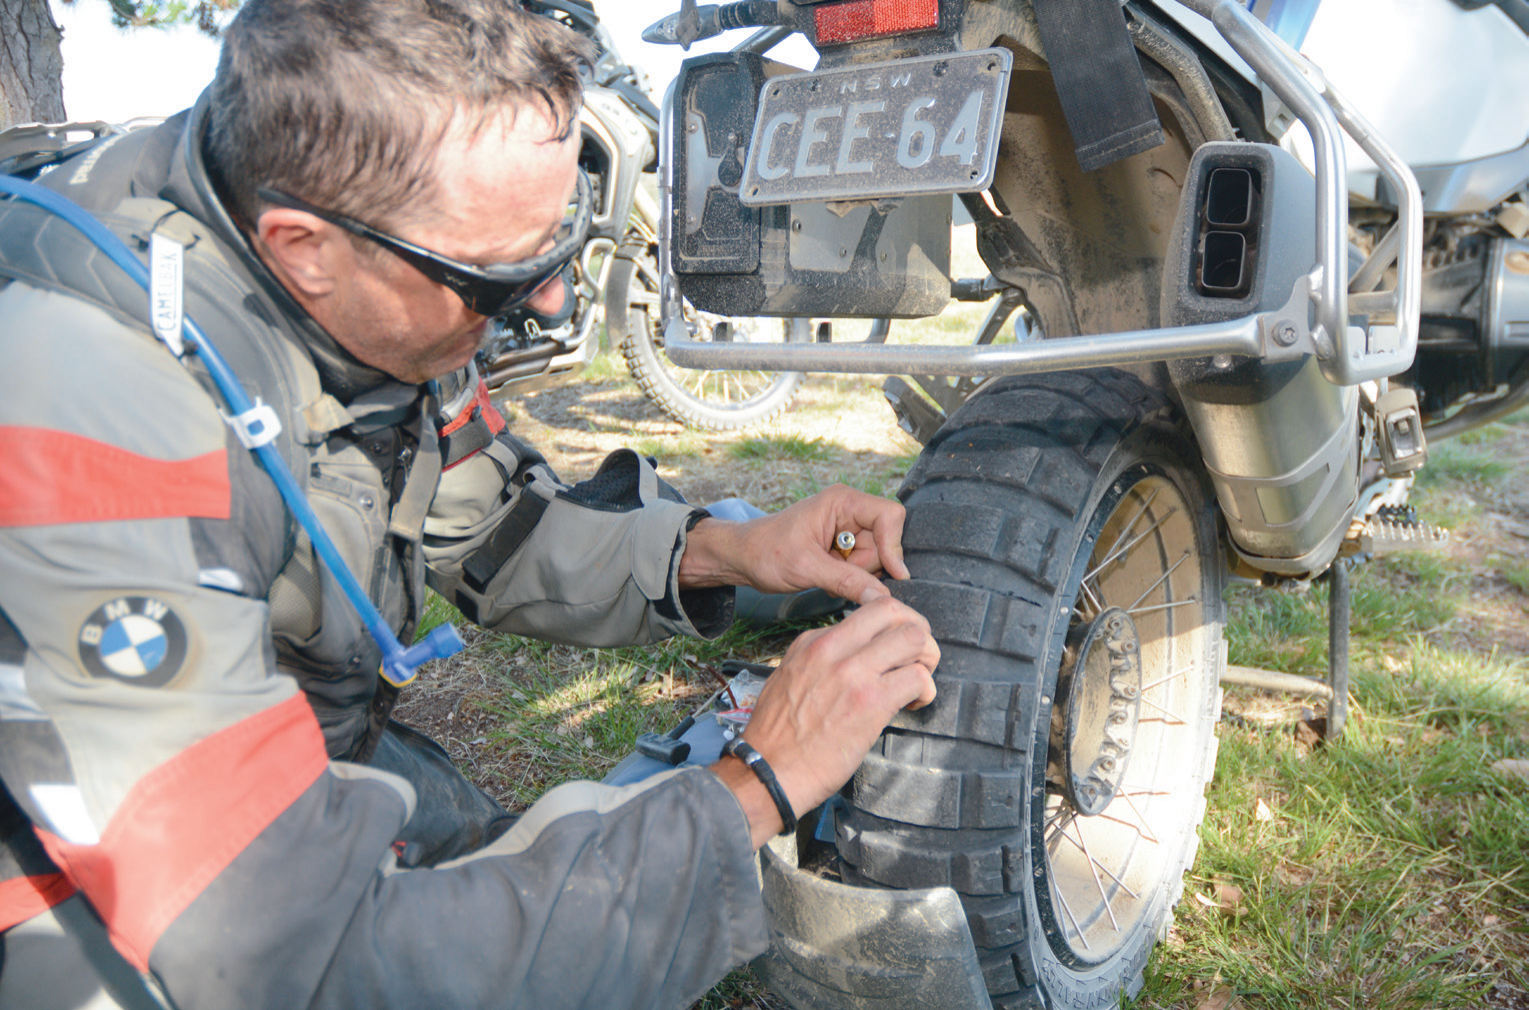
- Tubeless Bliss with Miles Davis
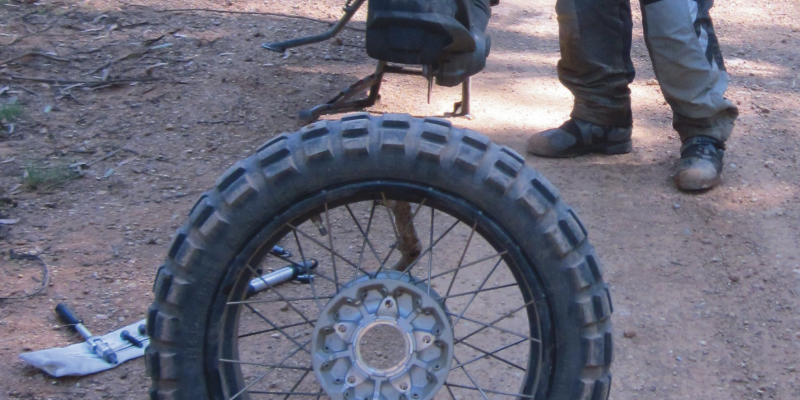
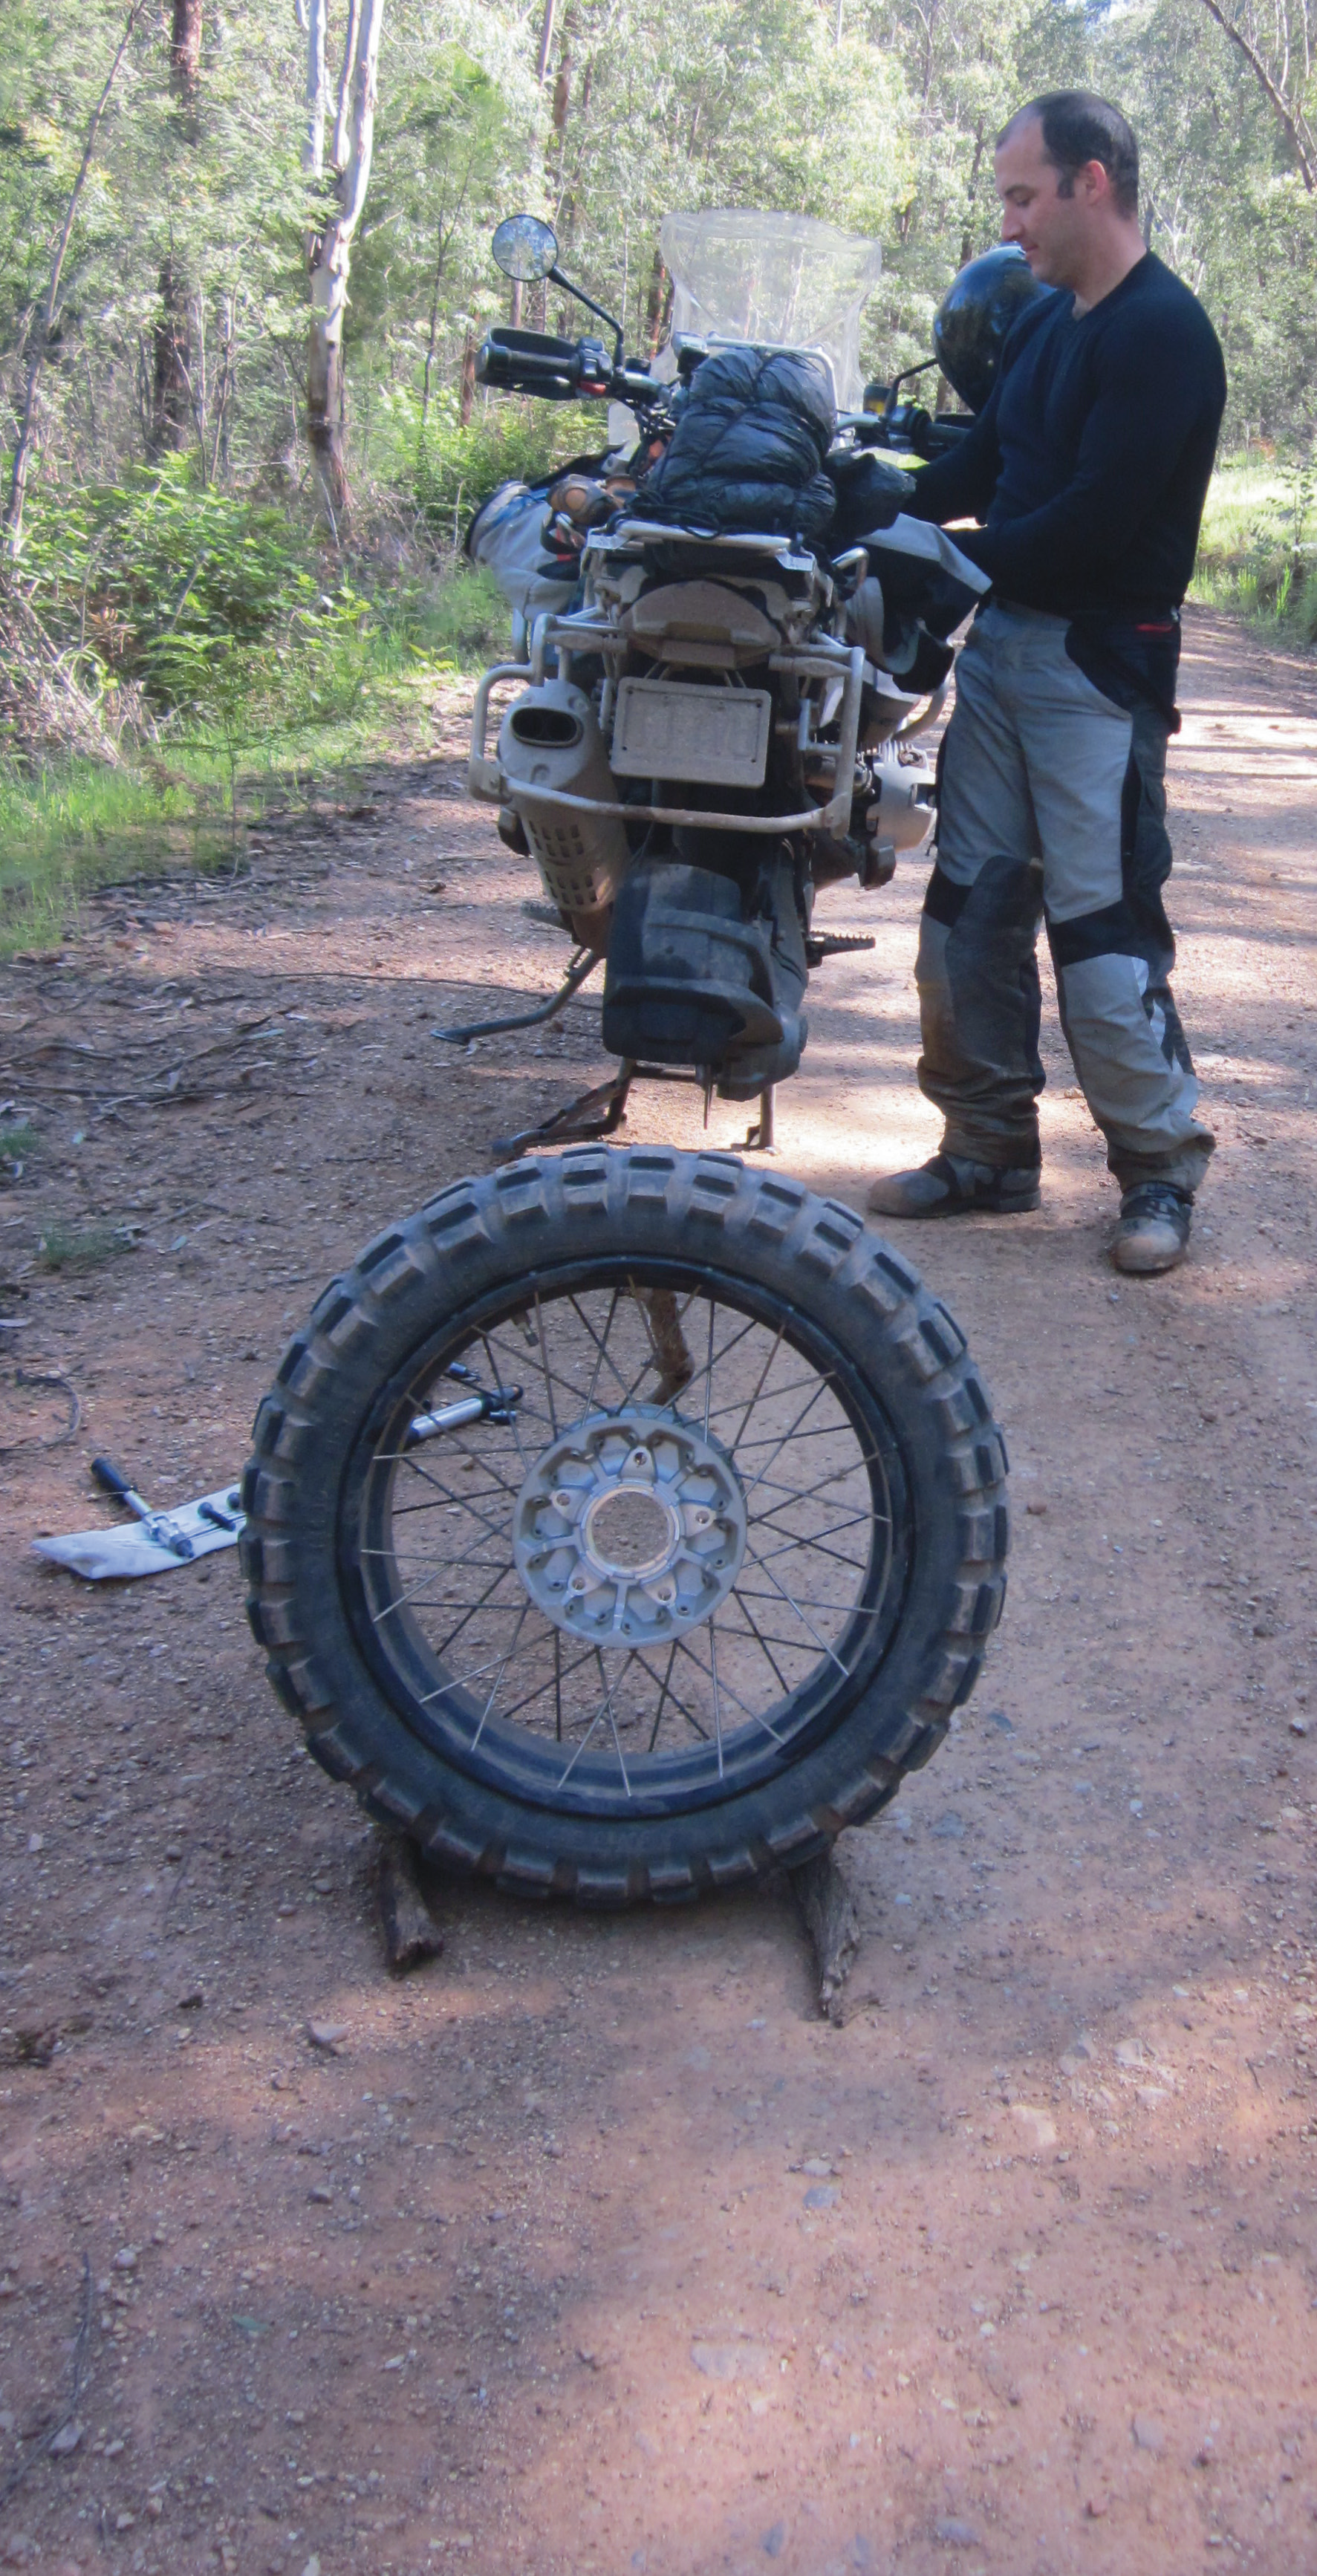
- Retyrement with Andy Strapz
- Food For Thought with Karen Ramsay
- Checkout
- Fit Out
I have probably ridden a conservative 10,000km per year for the last 19 years, so next year I should hit the big 200K. I’ve had some amazing rides, seen some incredible places and met some great people, and I feel pretty blessed for all of this.
Most of the kilometres have been on GS boxer twins, from 1150s to 1200s and now 1250 models, and they all run a tubeless-tyre system as standard.In all of those kilometres I’ve probably had between 30 and 40 punctures, and repaired another 30 or 40 for other people. Guess how many times I have had to remove a wheel to fix a flat?
The answer is ‘once’.
 It’s very rare a tubeless tyre needs to be removed to repair a puncture.
Be prepared
It sounds pretty amazing, but it’s true.
Of all of the punctures I’ve had, only one had cut the tyre so badly I couldn’t complete the repair with a plug, or on the odd occasion with two or three plugs.
The one time I needed to fit a tube was on the 2015 GS Safari, on the morning of the first day, departing Jenolan Caves with a brand-new tyre. It went down almost instantly. I stopped, put the bike on the centrestand and saw the cut. I tried to plug it with a couple of plugs but soon realised it was a tube job.
I can fix a flat on a tubed tyre pretty quickly. I can fit a new rear tyre in the 15-minute work period at an enduro. In recent years I’ve been running mousse tubes on my enduro bike, and I fit these myself and for mates.
During GS Safari recces I always carry a spare tube in case of a slashed tyre in the middle of nowhere. I’ve had punctures on recces, and I’ve always been able to plug them, but I’ll continue carrying a tube because you never know when you’re going to need one.
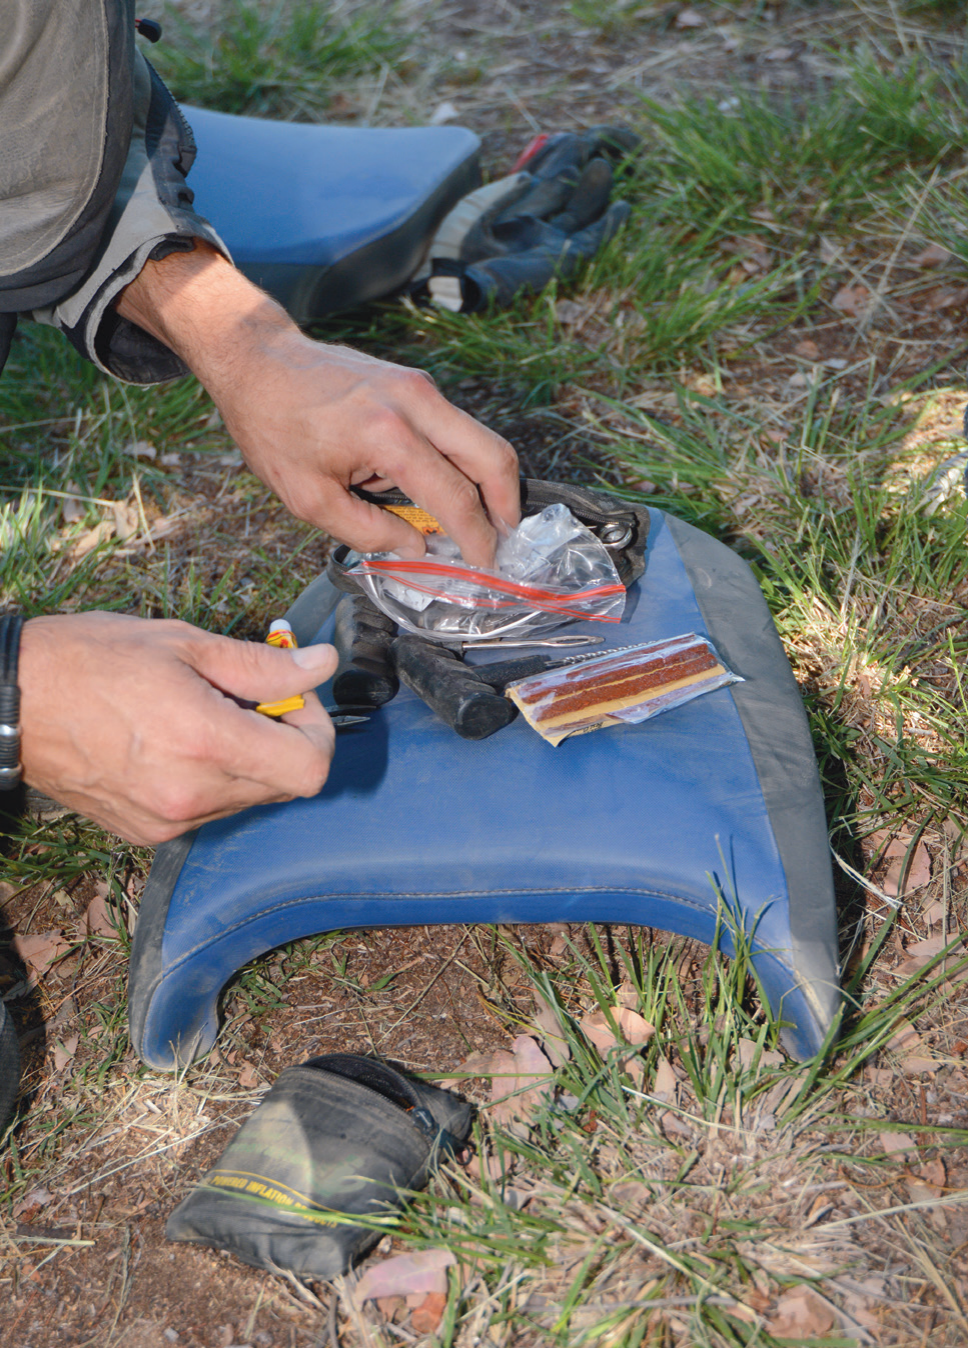 Always travel with a basic tubeless repair kit.
Heads up
The normal scenario looks something like this: I’m cruising along loving life, then I notice a warning light on my dash RDC (the German acronym for ‘tyre pressure control’) and my tyre pressure showing something like 35psi/29psi. This shows me my front tyre is at 35 and my rear has dropped from between 35psi and 40psi down to 29psi. Generally, if it’s a slow leak, I won’t have noticed a change in performance or feel, but it’s nice to get a heads up before I do notice.
 Miles Davis
Step 1
There’s no major stress.
I normally keep an eye on the numbers to get an idea of how quickly pressure is dropping. Sometimes it’s dropping quite rapidly. Other times it’s holding pressure and only dropping a very small amount every 10 or 20 minutes. Once I know the situation I plan where to do the repair.
If I’m remote and hot I’ll look for a tree or shaded area. Other times I figure if it will hold until I come into the next town and maybe pull up at a servo.
 Simply spitting on your finger and swiping the plugged area should give you an idea if it has sealed.
Step 2
Pull up and put the bike onto the centre stand.
Make sure you leave your ignition on, as the RDC readings are very handy during the repair. You can monitor pressure loss and then use the dash as a gauge when reinflating the tyre. If you turn off the ignition you lose the pressure display, and if you turn the ignition on again you get blank readings until the tyres rotate.
Only once or twice have I had a flat on my Rallye X with no centrestand. This just makes it a bit trickier to find the flat. The bike has to be propped on a log or some other support.
With the bike on the centrestand, select neutral and spin the wheel to see if there’s a foreign object – a screw, nail or some-thing else – visible. This is the best option as you don’t have to search for what might be a small hole where you may need to pour water over the tyre and look for bubbles. Generally you can locate the puncture easily, but not always.
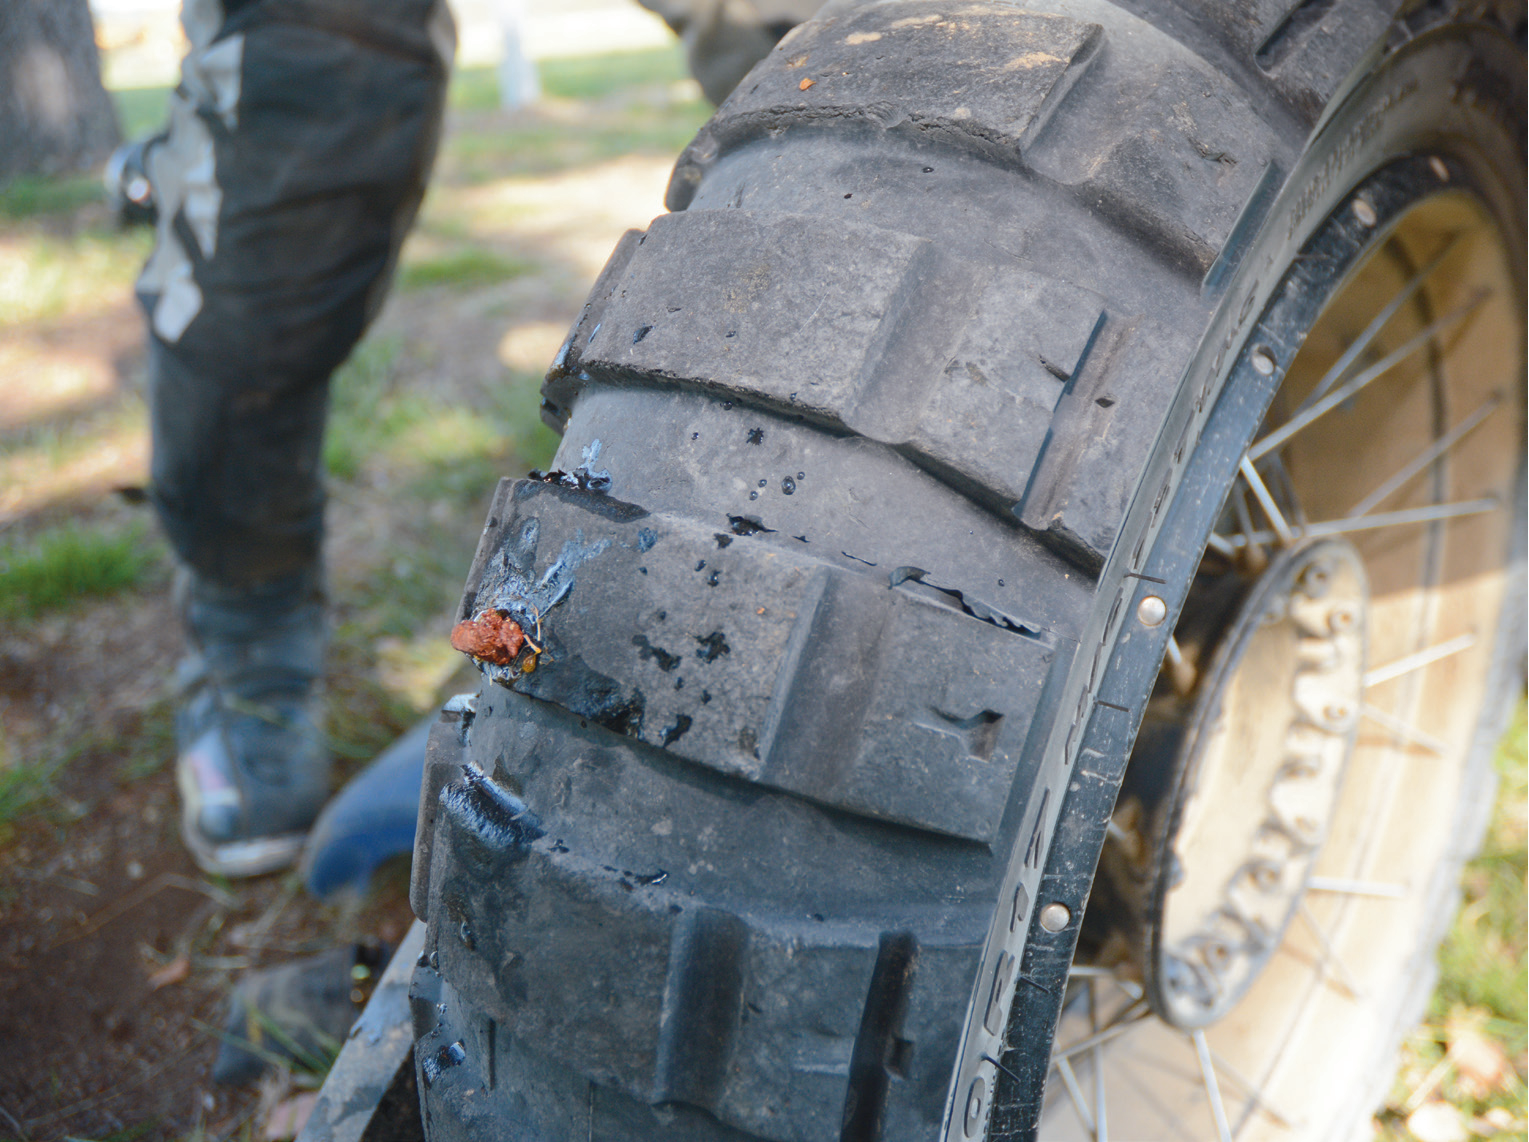 You can trim the excess plug hanging out of the tyre, but don’t try to cut it too flush. A bit of excess is fine.
Step 3
Maybe you’ll have someone with you who is already pulling out a tubeless repair kit, or compressor, or both. If the hole is losing air quickly you can get someone to simply put their finger on the hole while you’re getting ready.
Use the reaming tool to roughen up and clean the hole. Sometimes it’s very difficult to even get the reaming tool into the hole. Other times not, so you quickly know what size puncture you’re dealing with. I always travel with the basic BMW tubeless repair kit which has quite chunky circular plugs great for a bigger hole or cut. I also travel with basic tubeless repair liquorice-string plugs as these are great for smaller holes from nails and wire.
Load the desired plug onto the installation tool (which in many cases is also the reaming tool) and apply some glue to the tip and plug. This will help lube the plug for easier installation and assist with sealing the hole.
Step 4: plug away
Push the tool loaded with the plug into the hole so the tip goes at least five millimetres into the carcass. For smaller, chunky plugs, make sure you don’t push it all the way in. For string, it’s easier to manage as there’s more excess hanging out of the tyre.
Step 5: remove the tool
The design of the tool is such that it pushes the plug into the tyre, then leaves it there when you pull the tool out. It’s quite simple and surprising for some, but the plug stays in place.
Step 6: evaluate
If your tyre still has pressure, and it generally will, check to see if the hole is sealed.
Look, listen, feel (like first aid for your bike). If it’s lost pressure, start reinflation via a pump, C02 bottle or compressor. Simply spitting on your finger and swiping the plugged area should give you an idea if it has sealed, but keep an eye on your dash if you have a pressure display.
Step 7: pump it up
You can start adding air even before you’re sure the hole is sealed.
Sometimes after the repair I actually overinflate by a few PSI as every now and then the tyre may slowly keep losing pressure.
Step 8: re-evaluate
By the time you have the tyre back up to pressure you may have a better idea if the plug has sealed the hole completely.
Sometimes you may still have a very small leak from one edge of the plug. In this instance simply add another, probably a string, unless it’s a big hole and it may need two or three plugs to get it to seal.
Step 9: pack up and ride
I generally have good luck with the repair first time round.
You can trim the excess plug hanging out of the tyre, but don’t try to cut it too flush. A bit of excess is fine.
Keep an eye on your pressure and if it still has a slow leak you need to decide if you should go through the process again, or maybe you can make it to your over-night stop.
On a good day, with a basic puncture and a good nurse by my side I can have a repair done in less than five minutes.
No wheel removal, no tyre levers, no tubes and no scratched rims.
So ask me do I like tubeless tyres on my adventure bikes?
Shit, yeah!
 Keeping pressures up will go a long way to preventing front-wheel damage.
Flat refusal
In recent years I have heard people say, “If you want to come on my ride you need to put tubes into your GS.” And I know that some tour operators insist riders of tubeless bikes fit tubes. When I heard this I was quite miffed. Why would you want to put a tube into a tubeless tyre? That means that for every single puncture you receive, it’s wheel out, tyre levers, tubes and all the rest.
I’ve tried to think of possible reasons this rule may be put in place, and I’ve even asked people, but I haven’t received a definitive, clear answer.
These are some reasons why I think someone may give this advice:
• They’ve never used tubeless so they don’t know the benefits
• Maybe there are some tubeless wheels that don’t work as well as those I’ve used. I do know some tyres are not designed to run tubeless, and some cheaper brands do lose pressure at the bead
• They heard or saw someone riding tubeless hit something hard and burp air out of their tyres – usually the front – which required reinflation. Maybe the rider was running too low a pressure, or maybe it was correct pressure with a major impact. No wheel removal to reinflate tyre, so no major issue
• They heard or saw someone riding tubeless hit something hard and damage the rim which lost air and couldn’t be reinflated due to the flat spot on the rim. Maybe the rider was running too low a pressure or it was a technique or line selection issue. Regardless, if they had a tube fitted they probably would have had the same impact, same rim damage and had a pinched tube to replace. So in this case there was no disadvantage to running tubeless. Both examples require wheel removal to repair.
Float like a butterfly
Over the years I’ve seen riders damaging front wheels and/or regularly getting flat tyres. In my almost 200,000km of riding I’ve never lost air pressure from an impact or destroyed a front wheel. I definitely can’t say I’ve never added some character to a front wheel, but nothing that needed to be repaired or replaced.
I do hit things hard from time to time, but my tyre pressure is up and I do try to ride light on the bike, pick good lines and soak up impacts, rather than bulldoze through them. This is adventure riding, so that sort of approach is the best way to look after you and your bike.
 Demonstrating tubeless repair with BMW’s Benno at a Touratech Challenge.
Finken mousse
The only time I’ve done something whacky to a bike set up was when I raced Finke in 2017 on the 1200GS Rallye X.
I was worried about front-wheel damage and I didn’t want to run 35psi in the sand and bulldust, but I knew lower pressure would possibly cause burped air or risk rim damage. A tube wasn’t a better option as a pinch flat would be a likely outcome at a lower pressure.
I’d been using mousse tubes on my enduro bike so I thought a 19-inch rear motocross mousse might fit into the front 19-inch GS wheel. I was excited and nervous when the mousse arrived at work. I enlisted two helpers and we gave it a go. After a few tries I was getting close to giving up. The lads said, “Come on. One more try.”
I thought the tyre bead was going to let go, but finally we got the Pirelli Scorpion Rally fitted. I only used that front wheel for the race and the Simpson crossing straight after the event. Without that set up I’m sure Finke would have been a lot harder to complete as rim damage and/or flats would’ve been a massive risk.
If your bike is set up for tubeless, maybe you should try it to see how it works for you. Carry a tubeless repair kit as well as a spare tube and tyre levers as a backup.Keep your pressures up and ride smooth!


Comments